Technical Tip
You can also add or view narrative text for a debtor by pressing the F5 key – see "Adding or Viewing Narrative Text" in the Welcome to Micronet manual.
You can add unlimited additional text for any debtor that may be printed or displayed on order entry screens, invoices, reports, etc. There are two types of text you can add using this procedure:
|
|
|
Technical Tip You can also add or view narrative text for a debtor by pressing the F5 key – see "Adding or Viewing Narrative Text" in the Welcome to Micronet manual. |
You might use this type of text to set up delivery instructions that apply to all deliveries for this debtor.
|
|
|
Technical Tip Alternatively, you could set up a user defined question (UDQ) allowing users to enter delivery instructions for individual orders – see "Edit Company - Edit - User Defined Fields". Note that any delivery instructions entered in a UDQ will override those written as debtor text. |
To add, insert, or delete debtor’s text that may be printed or displayed on order entry screens, invoices, reports, etc.:
Refer to "Adding a New Debtor" or "Updating a Debtor".
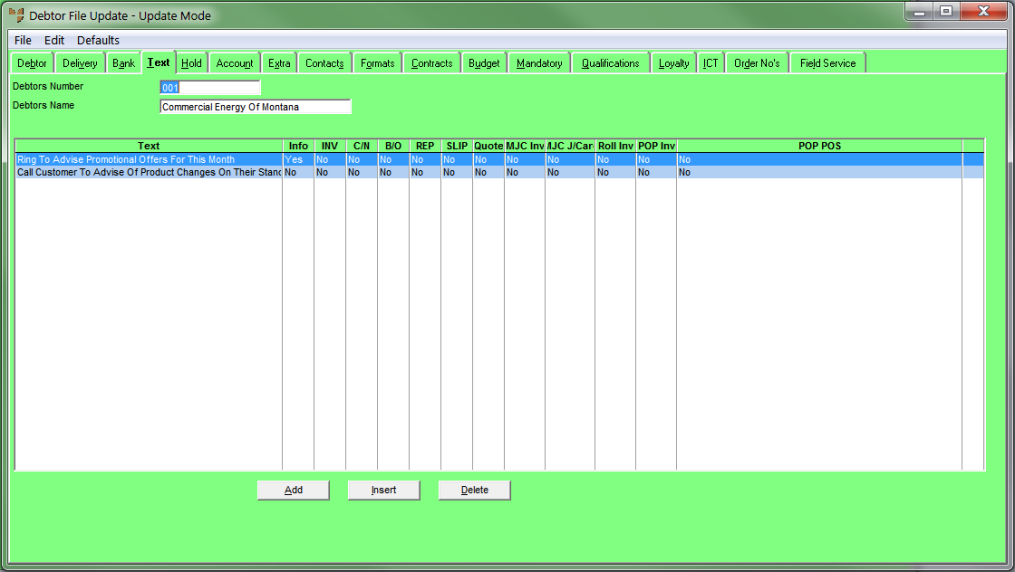
Micronet displays the Debtor File Update screen - Text tab.
If you selected to add, insert or edit a text line, Micronet displays the Debtors Text screen.
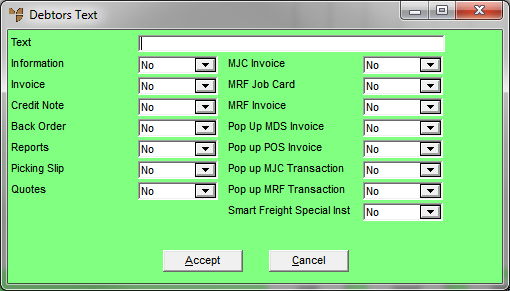
If you are setting up SmartFreight, enter the text you want sent to SmartFreight as delivery instructions for this debtor.
|
|
Field |
Value |
|---|---|---|
|
|
Information |
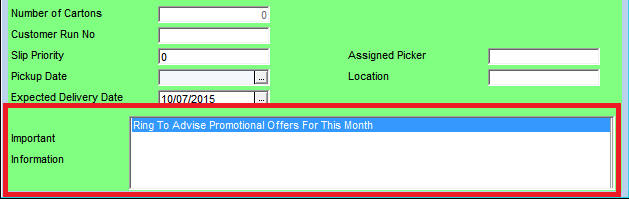
Select Yes to display the text on order entry/purchasing screens for operators to see during transactions. For example, Micronet displays this information at order entry time in the Invoice Header screen.
|
|
|
Invoice |
Select Yes to print the text on invoices. |
|
|
Credit Note |
Select Yes to print the text on credit notes. |
|
|
Backorder |
Select Yes to print the text on backorders. |
|
|
Reports |
Select Yes to print the text on debtor-related reports/inquiries. |
|
|
Picking Slip |
Select Yes to print the text on picking slips. |
|
|
Quotes |
Select Yes to print the text on quotes. |
|
|
MJC Invoice |
Select Yes to print the text on Micronet MJC invoices. |
|
|
MRF Job Card |
Select Yes to print the text on Micronet MRF job cards. |
|
|
MRF Invoice |
Select Yes to print the text on Micronet MRF invoices. |
|
|
Pop Up MDS Invoice |
Select Yes to display the text as a pop-up during MDS sales order entry. |
|
|
Pop Up POS Invoice |
Select Yes to display the text as a pop-up during POS sales order entry. |
|
|
Pop Up MJC Transaction |
Select Yes to display the text as a pop-up in MJC when adding this item to jobs. |
|
|
Pop Up MRF Transaction |
Select Yes to display the text as a pop-up in MRF when adding this item to orders/tickets. |
|
|
Smart Freight Special Inst |
Select Yes if you are setting up delivery instructions for SmartFreight. |
If you selected to add a text line, Micronet redisplays the Debtors Text screen so you can add further text lines.
Micronet redisplays the Debtor File Update screen - Text tab showing all the text lines added.
Refer to "Debtor File Update Screen - Menu Options".